Tuesday, February 16, 2021
VL53L0X NIR laser time-of-flight distance sensor with cover
These distance sensors are pretty nice, but most are sold without a protective cover and the makeshift glass or tape covers I tried did interfere with the ranging to some extent. This could be okay with some recalibration of the distance measurements, although for cases of significant interference, e.g. thicker glass tested, the unit would no longer be able to do longer ranges > 1 meter at all. In the end I found this unit that is very affordable and comes with a nice cover that causes minimal interference.
Wednesday, January 13, 2021
Hummingbird nectar recipe by weight (grams)
Online resources say 1:4 sugar to water ratio by volume. This translates to about 1:5 by weight
To be more precise: 0.25 cups sugar is 48 g, 1 cup water is 237 g, so the ratio is 1:4.9375 or 0.2025:1 or 16.8% sugar by weight. For my small feeder, I do 30 g sugar to 150 g water.
Remember to use only refined white sugar. Online resources say that substitutes (e.g. organic sugar that is a bit darker) may be bad for the birds.
Friday, June 17, 2016
Smoked trout on a Weber Q1200
I recently watched Jamie Cooks Summer and was inspired to try smoking some trout. I didn't have a bucket handy to do his method, but I have a Weber Q1200 small gas grill, so I wondered if it would be possible to rig something up.
I came up with the following method. I have repeated this multiple times and have been very pleased with the results. Definitely interested to hear others' suggestions.
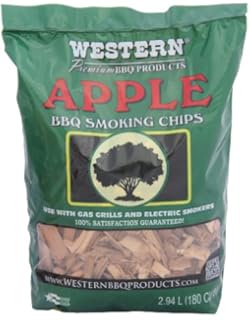
The Weber Q1000/Q1200 are the smallest gas grills Weber makes. For a gas grill, you want wood chips rather than wood chunks to smoke with. I use these:
One option I have seen is just to wrap the chips in foil and put the packet directly on the fire. Instead I put the foil in a standard 10 inch Lodge cast iron pan:

Cover the pan with foil:

Poke holes in the foil:

And put the pan on the grill:

This just fits inside the Q1200. I heat this on full gas until it starts smoking. (I've also tried heating it on the stove to get it going while I dress the fish, which works fine if you don't mind getting a little smoke inside the house.)
To prep the fish, just simple salt and pepper and some lemon and shallot slices tucked inside tastes great. I would say the shallot is really key.

To cook the fish gently without putting it too close to the heat, I lay it on top of the foil-covered pan. To prevent sticking it helps to oil the foil, or else just put a layer of lemon slices or greens in between the foil and the fish.

I then cover the whole thing with more foil to keep the smoke in. Some other cover would be more convenient here, perhaps a large pie tin?

Cooking time depends a bit. I'm not that interested in slow / cold smoking, so I just leave it at 3/4 gas and close the lid. The built in thermometer says the grill is ~350 F. For whole fish I do this 10-15 minutes each side. You could definitely play with lower heat and longer if you want. Or if you want to get to eating faster you can throw the fish straight on the grill for a minute after smoking is done.
This one didn't turn out so pretty; not enough insulation between fish and foil. But tastes wonderful!

I came up with the following method. I have repeated this multiple times and have been very pleased with the results. Definitely interested to hear others' suggestions.
The Weber Q1000/Q1200 are the smallest gas grills Weber makes. For a gas grill, you want wood chips rather than wood chunks to smoke with. I use these:
One option I have seen is just to wrap the chips in foil and put the packet directly on the fire. Instead I put the foil in a standard 10 inch Lodge cast iron pan:

Cover the pan with foil:

Poke holes in the foil:

And put the pan on the grill:

This just fits inside the Q1200. I heat this on full gas until it starts smoking. (I've also tried heating it on the stove to get it going while I dress the fish, which works fine if you don't mind getting a little smoke inside the house.)
To prep the fish, just simple salt and pepper and some lemon and shallot slices tucked inside tastes great. I would say the shallot is really key.

To cook the fish gently without putting it too close to the heat, I lay it on top of the foil-covered pan. To prevent sticking it helps to oil the foil, or else just put a layer of lemon slices or greens in between the foil and the fish.

I then cover the whole thing with more foil to keep the smoke in. Some other cover would be more convenient here, perhaps a large pie tin?

Cooking time depends a bit. I'm not that interested in slow / cold smoking, so I just leave it at 3/4 gas and close the lid. The built in thermometer says the grill is ~350 F. For whole fish I do this 10-15 minutes each side. You could definitely play with lower heat and longer if you want. Or if you want to get to eating faster you can throw the fish straight on the grill for a minute after smoking is done.
This one didn't turn out so pretty; not enough insulation between fish and foil. But tastes wonderful!

Saturday, May 21, 2016
Update 3: DIY Hario conical burr grinder Kitchenaid stand mixer attachment
Probably final update to the previous 3D printed design is here. (No change to the previous bearing adapter piece design.) You can also order these designs essentially at cost here. The main changes are there are now 3 set screws in the adapter instead of 2, and the square bit has chamfered corners to help it go into the hub a bit easier.
With the additional set screw, I have been using this piece intermittently for over a year without it wearing out. Please note that I believe this can put stress on the KitchenAid motor if you are trying to do a very fine grind or if you are using harder coffee beans (e.g. light roast).
I've been using this with both my larger and smaller Hario burr grinders. For the small grinder with the pentagonal driver, I found a stainless steel adapter available here. There are other sellers with similar items; I don't know whose design was first but this seller is amiable.
Monday, September 7, 2015
Mount Auburn Cemetery Map and Key
Mount Auburn Cemetery used to distribute this map of the grounds with notable monuments marked. Maybe they still do distribute it, but they don't seem to have made it available online. A few other people have posted the map, but I didn't find the key to the notable monuments posted anywhere, so here are both.


Saturday, March 2, 2013
LIRC RasPi remote control configuration for GE Air Conditioner
I set up lirc_rpi so that I can use my RaspberryPi as an infrared remote control. As detailed nicely here, the process has been much simplified, at least if you're on Raspbian. Note, as I commented there, you'll probably want to add --listen to your LIRC_ARGS in hardware.conf so that you can connect to the LIRC daemon from your home network. This allows you to send IR remote control signals out from the RasPi by connecting from any computer. There's also a nice Android app called Amote, probably there are good ones for iOS as well.
I found that our Samsung BN59-00857A remote worked fine with an existing lircd.conf configuration file for the BN59-00856A. (Actually the 00856 includes a few additional buttons not on the 00857; several of these work for controlling our TV even though they're not on our OEM remote!)
When it came to controlling our GE air conditioner, I didn't find any existing configuration file. The process of getting a working config file together was a little more involved than I expected, so I'm detailing it here and posting the resulting config (also sent it to the LIRC maintainers, but didn't hear anything back).
I knew from running mode2 that raw signals from the AC remote were being received correctly. But I wasn't able to get irrecord to pick up the AC remote signals even when forcing it into raw mode. It turns out that the GE AC remote has an unusually long code length, 48 bits, so maybe that was part of the issue. I'm also not clear on whether my irrecord was going into raw mode correctly; seemed to behave exactly like non-raw mode so maybe there's a problem with the version built for Raspbian?
Anyway, to get a config file, I had to pipe the mode2 raw data to text files and then manually pull the text into a raw conf file and filter out the "pulse" and "space" text (thanks vim). I confirmed that the resulting raw file works for controlling the AC through LIRC. Then I used irrecord -a to retroactively convert the raw codes into a more succinct config file. Looking at the various wall mount ACs GE sells, it seems likely to me that these codes will work for any unit since the controls all look the same. (If you have a heat+cool unit then you'll be missing the "heat" button since my AC doesn't have that.)
Hope it's useful. If you want the raw version of the conf file for some reason, just ping me for it.
# this config file was automatically generated
# using lirc-0.9.0-pre1(emulation) on Sat Mar  2 14:09:22 2013
#
# contributed by Peter Li
#
# brand: GE
# model no. of remote control:
# devices being controlled by this remote: All the GE wall mount air
# conditioners look like they have very similar controls, so I would guess this
# will work for all.  It will probably also work for the Heat/Cool wall models,
# other than the missing heat button, but I haven't tried that.
#

begin remote

    name  GE_AirConditioner
    bits           48
    flags SPACE_ENC
    eps            30
    aeps          100

    header       3388  1678
    one           430  1257
    zero          430   412
    ptrail        428
    gap          40991
    toggle_bit_mask 0x0

    begin codes
        on_stop                  0x555AF308598F
        cool                     0x555AF3081D8F
        fan                      0x555AF3085D8B
        tempup                   0x555AF308D987
        tempdown                 0x555AF308198B
        timeron                  0x555AF308D58B
        timeroff                 0x555AF308958F
        hi                       0x555AF308DD83
        mid                      0x555AF3083D8D
        low                      0x555AF308BD85
        sleep                    0x555AF3085583
    end codes

end remote
Tuesday, January 15, 2013
CDC Infant Growth Curves in Google Docs/Drive Spreadsheet
I thought other parents, etc. might find this useful. I copied the CDC's 2000 Infant Growth Chart data (weight-for-age, length-for-age, head-circumference-for-age, weight-for-length) into a Google Docs/Drive Spreadsheet. I'll probably keep adding to this to give Imperial units and maybe put in charts.
Saturday, July 28, 2012
Update 2: DIY Hario conical burr grinder Kitchenaid stand mixer attachment
More updates to the previous 3D printed prototypes. The pieces are available on Thingiverse and Shapeways. These pieces were 3D printed by Shapeways in their White, Strong, Flexible material. Screwing the set screws directly into the plastic instead of tapping the holes kept the piece viable for several months before it wore out.
Managed to get a pretty decent locating fit for a 3/8" x 5/8" x 5/32" sealed, pre-lubricated ball bearing from VXB. They have a lot of options in this size. I ordered two to choose from, but only one fit into the printed flange piece easily with just my hand pressure even though they were rated for the same maximum OD and tolerance. So I think the current design is close to the edge of hand pressed fitting for the low tolerance of the current SLS 3D printing process.

If you look carefully at the bottom edge of the flange where it contacts the drill adapter, you can see there is a step-wise pattern; this is because I tried to give the surface that contacts the drill adapter a gentle slope to match the slope on the front surface of the drill adapter. It basically works, but the 3D printing leaves this step pattern instead of a smooth slope. Probably not worth the trouble.
Here's the whole thing assembled. Note that the square driver piece is taking on a healthy coffee color due to the plastic material being porous and absorbing bits of coffee grounds. I've had this piece a while now and it's showing no signs of failing, so I think the 3D printed parts are reasonably successful for medium use. It's also kind of nice to know that the plastic part will fail before you kill the KitchenAid motor if you happen to jam things up some how.

Here's a picture of the extra 5/8" OD bearing I bought that didn't quite fit nicely. I also bought a 9/16" OD needle bearing to try, but it seemed better to stick to something with less depth and the 5/8" OD ball bearing was a small enough OD to work.

Managed to get a pretty decent locating fit for a 3/8" x 5/8" x 5/32" sealed, pre-lubricated ball bearing from VXB. They have a lot of options in this size. I ordered two to choose from, but only one fit into the printed flange piece easily with just my hand pressure even though they were rated for the same maximum OD and tolerance. So I think the current design is close to the edge of hand pressed fitting for the low tolerance of the current SLS 3D printing process.
If you look carefully at the bottom edge of the flange where it contacts the drill adapter, you can see there is a step-wise pattern; this is because I tried to give the surface that contacts the drill adapter a gentle slope to match the slope on the front surface of the drill adapter. It basically works, but the 3D printing leaves this step pattern instead of a smooth slope. Probably not worth the trouble.
Here's the whole thing assembled. Note that the square driver piece is taking on a healthy coffee color due to the plastic material being porous and absorbing bits of coffee grounds. I've had this piece a while now and it's showing no signs of failing, so I think the 3D printed parts are reasonably successful for medium use. It's also kind of nice to know that the plastic part will fail before you kill the KitchenAid motor if you happen to jam things up some how.
Here's a picture of the extra 5/8" OD bearing I bought that didn't quite fit nicely. I also bought a 9/16" OD needle bearing to try, but it seemed better to stick to something with less depth and the 5/8" OD ball bearing was a small enough OD to work.
Sunday, May 20, 2012
Update: DIY Hario conical burr grinder Kitchenaid stand mixer attachment
Update 3: More updates to the design, particularly housing for a ball bearing in the flange.
Update 2: It seemed like a Wiki was actually more appropriate, so I am retiring the Google Group in favor of a new Wikia page. Please join in!
Update: I created a Kitchenaid DIY Google Group to try to get together some of the handful of people who have been hacking on this. Also posted a listing of known projects.
Substantial updates to the earlier prototype. Here I've added an adapter flange that holds it in place against the Kitchenaid adapter hub. This was also supposed to house a sleeve bearing but I made the dimensions too tight so that will have to wait for next iteration. Also I found some nice, small, cheap, sealed ball bearings from VXB so will probably design for that instead. The coupling between the square hub and the 3/8" drill shaft is essentially the same as before, only shorter to leave room for the flange.

Here's a video of this version in action. Note that now I'm using it to drive the older Hario conical burr grinder model, rather than the Hario Slim. (We have both, one for home and one for my office. Kitchenaid only at home though ;).)
One advantage of the older Hario is that the coupling from the drill adapter to the grinder is simpler. The Hario Slim uses a pentagonal (AKA 5-point) drive in a small nonstandard size (~3/16"). I tried a 3D printed adapter for that but I don't think the Shapeways "Strong, Flexible" material is strong enough. I'm trying a lasercut acrylic piece next.
For the older Hario, the situation is much simpler. The drive has a nonstandard shape (cylindrical with flats on two opposite sides) for hand cranking, but it's also threaded as M6-1 so you can just screw something down on top of it. Actually, you can even just clamp the drill adapter directly down on this, as jeffkobi did in his original design. I wanted to try something simple and off-the-shelf to avoid clamping directly to the grinder, so I looked for M6-1 coupling nuts that would fit into the 3/8" drill adapter, but unfortunately they are all slightly too large. However, a 1/4-20 coupling nut fits snugly into the adapter (you may have to test a few to find one with clearance) and screws smoothly onto the grinder drive for the first few turns. I don't have any MechE, so can't really tell you the relative benefit of either clamping directly to the drive or screwing an unmatched thread onto it, but as long as I include some washers so that the 1/4-20 is only riding the M6 threads a little way I think this might be a little nicer. An M6@1/4-20 adapter nut or just an M6 with a smaller outer diameter would be ideal but I haven't found such a product.

The previous hub coupling has already worn out, so it's still not clear whether these 3D printed parts are viable. The first thing to go was the set screw holes; on the failed piece the screws get pushed back through their threads so the coupling no longer grips the 3/8" shaft. But I think the mistake there was to tap the holes and use nylon set screws before switching to steel set screws. On the new piece I just screwed steel set screws through the untapped hole so the fit is tighter and it seems to be holding up better so far. Probably a clamping adapter design would be better, although it would be a tight fit and I'm not sure how well 3D printed plastic would handle that kind of stress.
Update 2: It seemed like a Wiki was actually more appropriate, so I am retiring the Google Group in favor of a new Wikia page. Please join in!
Update: I created a Kitchenaid DIY Google Group to try to get together some of the handful of people who have been hacking on this. Also posted a listing of known projects.
Substantial updates to the earlier prototype. Here I've added an adapter flange that holds it in place against the Kitchenaid adapter hub. This was also supposed to house a sleeve bearing but I made the dimensions too tight so that will have to wait for next iteration. Also I found some nice, small, cheap, sealed ball bearings from VXB so will probably design for that instead. The coupling between the square hub and the 3/8" drill shaft is essentially the same as before, only shorter to leave room for the flange.
Here's a video of this version in action. Note that now I'm using it to drive the older Hario conical burr grinder model, rather than the Hario Slim. (We have both, one for home and one for my office. Kitchenaid only at home though ;).)
One advantage of the older Hario is that the coupling from the drill adapter to the grinder is simpler. The Hario Slim uses a pentagonal (AKA 5-point) drive in a small nonstandard size (~3/16"). I tried a 3D printed adapter for that but I don't think the Shapeways "Strong, Flexible" material is strong enough. I'm trying a lasercut acrylic piece next.
For the older Hario, the situation is much simpler. The drive has a nonstandard shape (cylindrical with flats on two opposite sides) for hand cranking, but it's also threaded as M6-1 so you can just screw something down on top of it. Actually, you can even just clamp the drill adapter directly down on this, as jeffkobi did in his original design. I wanted to try something simple and off-the-shelf to avoid clamping directly to the grinder, so I looked for M6-1 coupling nuts that would fit into the 3/8" drill adapter, but unfortunately they are all slightly too large. However, a 1/4-20 coupling nut fits snugly into the adapter (you may have to test a few to find one with clearance) and screws smoothly onto the grinder drive for the first few turns. I don't have any MechE, so can't really tell you the relative benefit of either clamping directly to the drive or screwing an unmatched thread onto it, but as long as I include some washers so that the 1/4-20 is only riding the M6 threads a little way I think this might be a little nicer. An M6@1/4-20 adapter nut or just an M6 with a smaller outer diameter would be ideal but I haven't found such a product.
The previous hub coupling has already worn out, so it's still not clear whether these 3D printed parts are viable. The first thing to go was the set screw holes; on the failed piece the screws get pushed back through their threads so the coupling no longer grips the 3/8" shaft. But I think the mistake there was to tap the holes and use nylon set screws before switching to steel set screws. On the new piece I just screwed steel set screws through the untapped hole so the fit is tighter and it seems to be holding up better so far. Probably a clamping adapter design would be better, although it would be a tight fit and I'm not sure how well 3D printed plastic would handle that kind of stress.
Sunday, April 15, 2012
Kitchenaid drill adapter
Update: this coupler has started to fail. See details on the update post, as well as a new model. Here are the links to Thingiverse and Shapeways, but be aware the current 3D printed plastic material ("White Strong Flexible") is not proven for long-term use.
Update: here's a video of it in action with the drill adapter clamped directly onto a Hario Slim Burr Grinder. Actually works pretty well as is, so I will put the piece on Thingiverse soon. Lots of refinements planned though.
A while back I had a brief flirtation with the idea of DIY Kitchenaid attachments, but never really got going on the project. Then recently, jeffkobi posted a nice Instructable on how to attach a Kyocera manual burr coffee grinder to your Kitchenaid and it rekindled my interest (not least because I own the same model burr grinder).
I really liked jeffkobi's idea of using an inexpensive Milescraft 90 degree drill adapter as the intermediary between the mixer and the grinder. So I've been trying to develop some simple 3D printable pieces to make it easier to couple the drill adapter to the Kitchenaid attachment hub. This is a work in progress and is going to take at least one more iteration to refine, but I'm pretty happy with how it looks so far, so here's some teasers.
Subscribe to:
Posts (Atom)